
How to Measure and Install Your Manual Attic Ladder Safely
DIY Guide: How to Measure and Install Your Manual Attic Ladder Safely
Buying a high-quality manual attic ladder is only half the battle; ensuring a perfect fit and a secure installation is where the magic happens. A poorly measured ladder is a safety hazard, while a perfectly installed one adds instant value and convenience to your home.
In this guide, we’ll break down the technical side of attic access so you can install your new stairs like a pro.
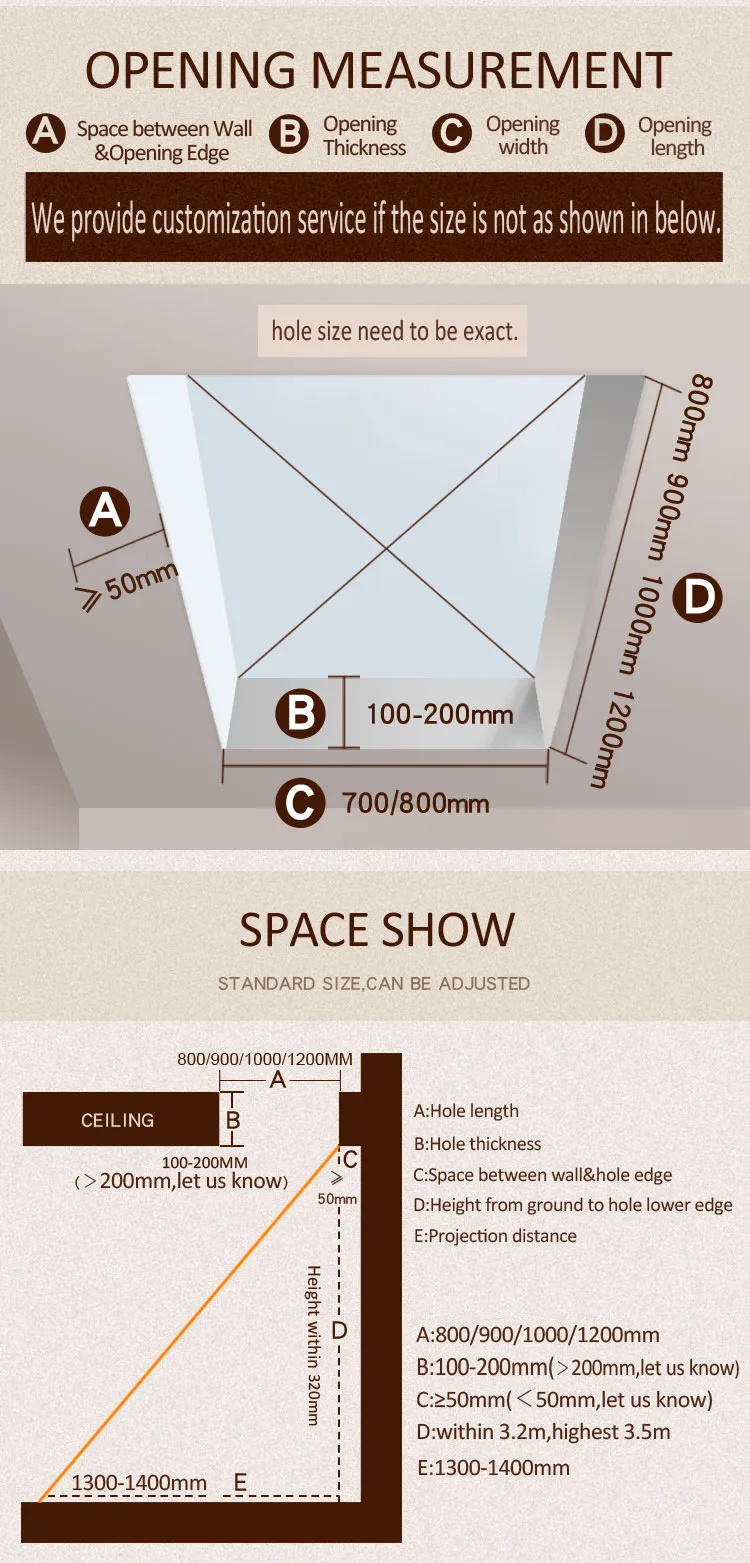
Step 1: Mastering the Measurements (The "Rough Opening")
Before you even order your ladder, you must know your Rough Opening dimensions. This is the structural hole in your ceiling.
- Standard Sizes: Most American and European homes use 22.5" x 54" or 25" x 54".
- Pro Tip: Measure twice! Check the width and length at three different points to account for any slight warping in the ceiling joists.
Step 2: Ceiling Height vs. Ladder Reach
Not all manual ladders are the same length. You need to measure from your finished floor to the finished ceiling.
- Our ladders are designed for heights ranging from 7ft to 10ft.
- If your ceiling is shorter, most of our telescopic or folding models allow for slight adjustments at the feet. See our adjustable models here.
Step 3: Clearance Space (Landing and Swing)
This is the most overlooked step. You need to ensure there is enough "swing room" for the ladder to fold down without hitting a wall or furniture.
- Swing Clearance: The arc the ladder makes as it opens.
- Landing Space: The distance from the hatch to where the ladder feet touch the floor.
Step 4: The Installation Process (A 2-Person Job)
While our ladders are DIY-ready, we always recommend having a partner.
- Mount the Temporary Cleats: Screw temporary wooden boards across the opening to support the ladder frame.
- Position the Frame: Lift the ladder into the opening from below.
- Secure the Hinge Side: Bolt the frame into the ceiling joists using the provided heavy-duty hardware.
- Level and Adjust: Ensure the hatch sits flush with the ceiling. Our Minimalist White Edition blends perfectly with white ceilings.
Step 5: Safety Checks and Maintenance
Once installed, perform a "stress test":
- Check that the Safety Spring Mechanism is tight.
- Ensure the Non-Slip Feet make full contact with the floor.
- Lubricate the hinges every 6 months for smooth, silent operation.
Conclusion: Safety You Can Feel
Installing a manual attic ladder is a rewarding weekend project that opens up a world of storage possibilities. By following these measurement and installation steps, you’re not just adding a ladder—you’re adding a permanent, safe gateway to your home’s hidden space.
[Still Unsure About Your Size? Contact Our Technical Team for a Free Consultation!]
FAQ: Installation Questions
Q: Can I install this into a finished ceiling? A: Yes, as long as you have access to the joists for structural support.
Q: Do I need special tools? A: Basic tools like a power drill, level, measuring tape, and a wrench are usually all you need.